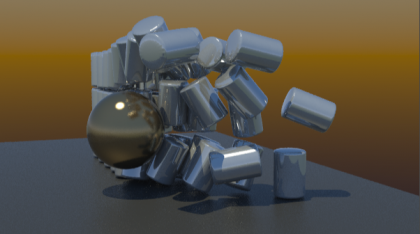
Tutorial – recoil Dynamics Plugin – Bullet Time Effect
This tutorial is for the plugin recoil available now for Modo 501. It is a free tutorial and you can download the free 3D scene for modo at the bottom of the tutorial. Â Recoil is a new rigid body dynamics plugin and I must say, a fantastic one that is well integrated into modo and super fun and fast to use. Â This tutorial will give you a brief outline of how to setup an easy scene with recoil and apply a nice stylized “bullet time” effect to slow down the time and sweep the camera in close to the dynamics. Â It’s a very fun effect and simply looks cool. To get started here are the requirements for this tutorial:
- modo 501
- recoil plugin
- intermediate knowledge of modo for animation keyframing and rendering
Step 1 – Add The Base Objects
If you want to create something similar to my animation, you will need:
- Ground plane or box for everything to sit on
- Sphere to launch at your objects
- A cylinder (using p-subs)
Make sure that each of these are in separate mesh layers so they have individual dynamics properties. 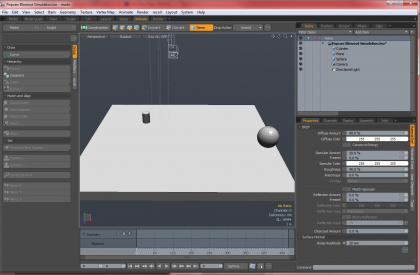
Step 2 – Set the Center of Gravity for the Objects
You can do this manually by selecting the center and eyeballing it into position or use the edit menu to Center to Bounding Box as shown in the picture. Â It is important to always ensure you have proper centers on your objects at it seems that is where the gravity force is directed and you obviously want the cylinder to be able to drop and bounce around it’s center when the simulation runs. 
Step 3 – Position Objects
Ensure your objects are positioned just above the ground object
Step 4 – Array Clone Your Objects
Duplicate your cylinder to make an array of objects stacked up. Â I used the settings shown in the image to get 10 wide by 2 deep and 3 high. Â You can make as many as you like however, and you can always adjust their positions and placement at any time. Â Just remember to keep the objects each in their own mesh so they are separate rigid bodies. 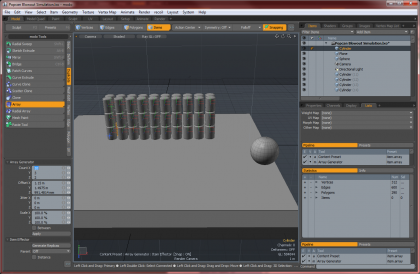
Step 5 – Passive Rigid Bodies
Set your ground plane to be a passive rigid body. Â Do this in the animate tab, under the recoil toolbar on the left side. 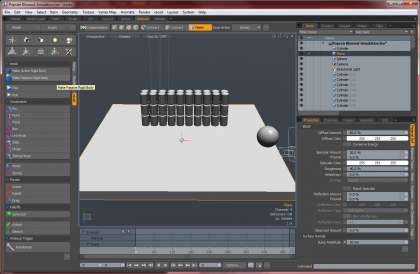
Step 6 – Active Rigid Bodies
Now select ALL of the cylinder mesh objects and set them to be active rigid bodies from the recoil toolbar. Also set your sphere to an active rigid body. 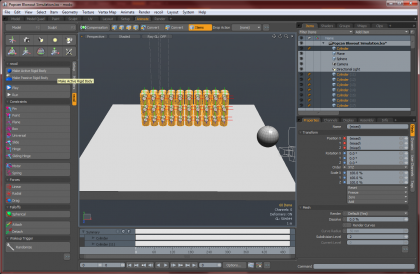
Step 7 – Setup the Sphere Dynamics
Impulse Force to Start the motion - You can add a simple impulse force to the sphere to launch it towards the cylinders to start things off.  In the position I put my sphere in, I needed a strong impulse to launch the sphere towards the cylinders on a -x, -z direction with a incline force of -y.  You will need to use the recoil simulation here to test your motion out.  This is where you will first start seeing the motion of recoil. Increase the mass of the sphere to make it seem much heavier than the cylinders. Set the Sphere to a active rigid body as well. 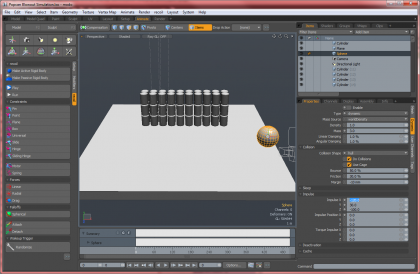
Step 8 – Start recoil Simulations
First thing to do is ensure you turn off the option “play real-time” since recoil can’t operate in real time with that option enabled. 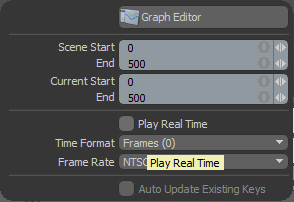 Then, you can simply press play on your timeline for recoil to show you its simulation. Â Test out the path you get with your sphere and adjust the direction it is launched using the impulse settings until you get the impact you are happy with. Â Its easy to change further on, but get it to something you thing works well. Note: You will also want to increase the length of your animation to 500 frames or so to give enough time for the simulation to run and let the motion come to a halt TIP: remember that recoil resets or clears the simulation everything you bring the frame back to 1 in a default scene. Â You can scrub the timeline as long as you don’t go back to frame 1 to clear the cache. Â If you do, you will need to go back to 0 and play the full timeline again to let the cache be rebuilt by real-time simulation.
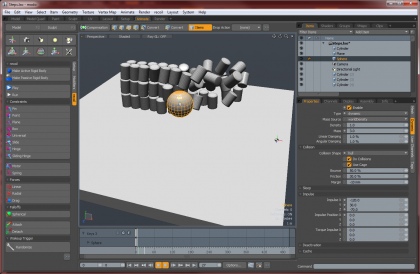
Step 9 – Bullet Time
Next, you must alter the timing of the simulation. Â Luckily, you can keyframe pretty much anything in modo, so you can also keyframe the recoil simulation speed to make your bullet time effect. Wherever you like in your simulation, you need to keyframe it at 100% (default) and then 6 frames later, add another key at about 20% speed. Â Leave it in slow motion for a second or two, then do the same in revers to pull the speed back to normal 100%. Â This will make the simulation slow to a crawl and appear in slow motion while still giving you full control of the animation and camera motion in modo. Â You can see the envelope curve I used but of course there are many ways to alter the speed and adjust the simulation rate using this channel. 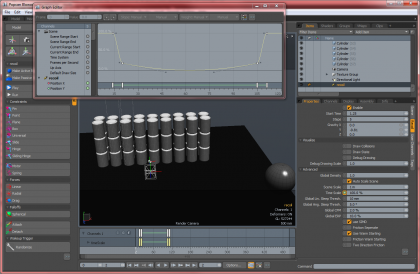
Step 10 – Sweep the Camera
Typically, bullet time goes to slow motion and then the camera will sweep in closer or around the action to show what is happening in slow motion. Â You can do this simply by keyframing the camera motion after you slowed down the simulation and moving or rotating the camera into a different closer view. Â In my animation, I modified the pivot point to help the camera sweep in sideways towards the action.
Step 11 – Simulate the “Bullet Time” Effect
Run the simulation tweaking your setting until you get the effect you want and adjust the timing of the camera motion to correspond with the slow motion effect. Â It’s best to let the slow motion effect go back to real time with the camera almost stopped, or moving slowly, so the viewer can realize what is going on when the speed changes. Â Its also up to you if you want to slow down the motion to a stop or leave a bit of slow motion in the curve you have to adjust for the simulation speed. Â I left a slight bit of motion even when the camera sweeps in close and slows right down, you still see some movement in the simulation and collisions themselves, which is the way I like it. Â One you have the speed of the simulation down, you can also adjust your camera position and speed to your liking.
Step 12 – Apply some Presets for a nicer Render
Open your preset browser (F6) and drag’n’drop some materials of your choosing to your new objects and materials. Â Make the adjustments you want in your render tab or using preview and you are off to setting up a nice bullet time physics animation.
Step 13 – Setup the Animation
Finally, set your animation with final settings before rendering:
- Add motion blur
- Add depth of field
- Key frame animate the focus point at various stages
- Add global illumination
- Customize the lighting and environment
Step 14 – Render your sequence 
Render out your sequence at the resolution you want and once ready, save it into an animation format.
Download the Tutorial Scene File for Free here: ModoTutorialScene

